Introduction
Ripping out an old asphalt driveway used to mean jackhammers, hand labor, and a crew burned out before the haul-off started. Skidsteers changed that. Compact size, a tight turning radius, and quick-attach tools make them the practical choice for driveway tear-outs and small pavement jobs.
"Just scoop it up" still oversimplifies the work. Results depend on machine size, the attachment you run, how thick and oxidized the asphalt is, and operator technique.
This guide covers the full removal sequence, the equipment that actually matters, the variables that decide whether the job stays on schedule, and the mistakes that turn a one-day tear-out into a multi-day headache.
Key Takeaways
- Skidsteers handle most driveways with bucket teeth, a ripper bar, or a milling/cold planer
- Thickness, base condition, and machine class drive how cleanly the removal goes
- Milling attachments create smaller, uniform debris that hauls faster
- Locate utilities and wear PPE before the first pass
- The right attachment often beats hiring out smaller driveway jobs
How to Remove an Asphalt Driveway with a Skidsteer
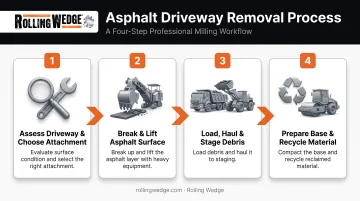
Step 1: Assess the Driveway and Choose Your Attachment
Walk the driveway first. Look for existing cracks, potholes, or edge separation. These are natural weak points and easier starting spots than an unbroken slab.
Match your attachment to the job:
- Tooth bucket: smaller driveways with thinner, older asphalt
- Ripper or tooth bar: medium-sized jobs or asphalt with more integrity
- Milling/cold planer attachment: larger jobs, or when you plan to recycle the material
Before you fire anything up, confirm the skidsteer's rated operating capacity and hydraulic flow actually match what the attachment calls for. Then mark utility lines and clear the work area of anything that could get in the way.
Step 2: Break and Lift the Asphalt Surface
Start at a cracked section or a free edge where the attachment can wedge underneath more easily than on solid pavement. From there:
- Sweep backward with ripper teeth or bucket teeth to pry slabs upward as you move
- If you're running a milling attachment, make controlled forward passes to plane the surface in layers rather than prying up big chunks
- Keep the attachment angle shallow. A steep bite risks gouging the subgrade unless you're intentionally excavating the base too
Step 3: Load, Haul, and Stage Debris
Once material is loosened, use the bucket to scoop it into piles or straight into a trailer or truck bed. Separate large slabs from smaller rubble; mixed piles slow down loading and can overload a bucket's capacity unevenly.
For volume estimates, the asphalt industry generally figures compacted pavement at 110 pounds per square yard per inch of thickness, according to an industry asphalt calculator. Measure your actual driveway area and thickness rather than assuming a "standard" tonnage. Driveways vary too much to guess.
Position your machine and hauling vehicle so you're not making unnecessary back-and-forth trips across the yard.
Step 4: Prepare the Base and Dispose of or Recycle the Material
If you're repaving right away, grade and compact the exposed subbase before laying new asphalt.
Old asphalt doesn't have to go to a landfill. According to a NAPA industry survey covering the 2024 construction season, more than 99% of reclaimed asphalt pavement (RAP) was reused, with 101.4 million tons going into new asphalt mixtures. Many recycling centers accept clean asphalt free of charge, and some even arrange pickup.
Before you haul anything, check local disposal rules. Some cities, like Seattle, ban asphalt from regular landfill disposal entirely, while other counties accept clean broken asphalt free at the landfill gate. Rules vary by municipality, so a five-minute phone call saves a wasted trip.
What You Need Before Removing Asphalt with a Skidsteer
Having the right equipment and a properly prepped site directly affects how fast the job goes, what it costs, and how clean the final result looks.
Equipment & Attachment Requirements
Most residential jobs call for a skidsteer in the 1,500–3,000 lb rated operating capacity range, with hydraulic flow matched to whatever attachment you're running. Manufacturer lineups show plenty of variation here. Some compact units rate around 1,750–2,000 lb ROC, so check your specific machine's spec sheet rather than assuming.
| Attachment | Best For | Trade-Off |
|---|---|---|
| Tooth bucket | Small jobs, cleanup after loosening | Slower on thick or intact pavement |
| Ripper/scarifier bar | Medium jobs, stubborn sections | Creates larger, uneven slabs |
| Hydraulic breaker | Reinforced or extra-thick pavement | Higher stress on the carrier if misused |
| Milling/cold planer with rolling-wedge tools | Larger jobs or when recycling material | Higher upfront attachment cost |
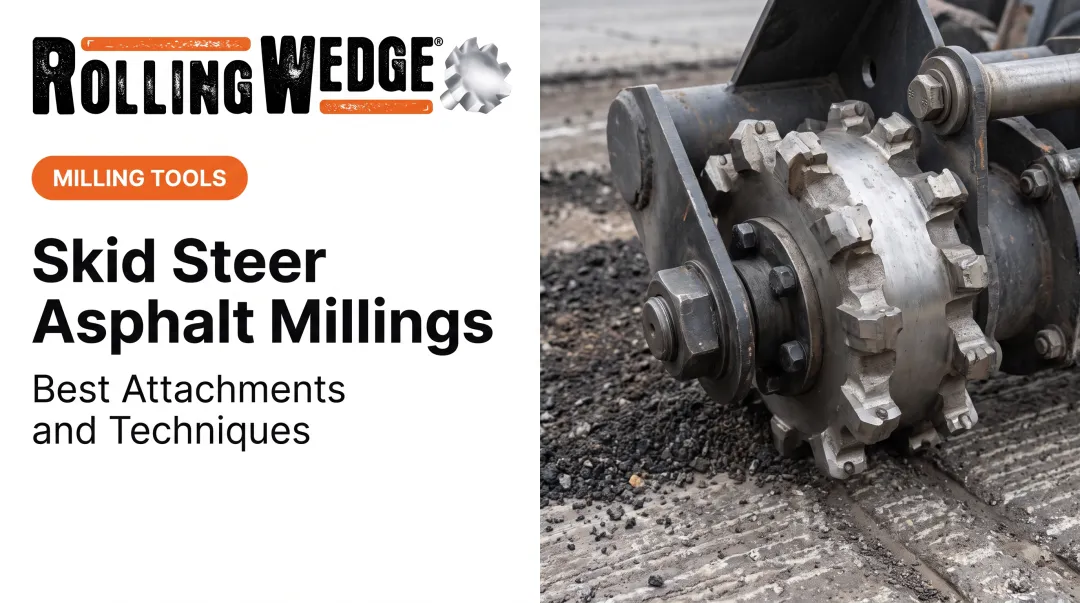
Rolling-wedge style cutting tools, like the Rolling Wedge Milling Tool on the Rolling Wedge Milling System for Skidsteer, are worth a look for tougher or larger driveway jobs. Instead of repeatedly impacting the surface like carbide-pick teeth, the tool rolls over and away from the material, putting it into tension and wedging cuttings loose - handling asphalt and embedded concrete edging in the same pass without swapping tooling.
That matters most on driveways with concrete curb edging or mixed-material sections, where a carbide-pick attachment would otherwise need a second tool change.
You'll also need a dump trailer, truck bed, or roll-off dumpster sized for the debris volume you calculated in Step 3.

Site & Safety Readiness
Call 811 (or your state's equivalent) before you dig. The 811 damage-prevention service recommends contacting them a few business days ahead and waiting for all utility responses before breaking ground. Skipping this step near a driveway edge is one of the most common and costly mistakes on this kind of job.
PPE isn't optional:
- Work boots with reinforced toes
- Gloves and eye/ear protection
- Hi-vis vest if you're working near a street or driveway with traffic
Make sure whoever's running the machine knows the controls cold and understands attachment-specific steps, including quick-attach locking and hydraulic hookups, before the bucket ever touches pavement.
Key Parameters That Affect Results
Outcomes here depend on a handful of variables you actually control, not just the size of the machine you rented.
Asphalt Thickness and Age
Thicker or older, more brittle asphalt needs a different breaking approach than a thin, newer surface. Thin asphalt often breaks apart quickly with basic bucket teeth. Thicker or newer pavement, which flexes more before it cracks, may need a ripper bar or milling attachment to avoid stalling the machine mid-pass.
Skidsteer Size and Hydraulic Flow
Attachment performance, especially with hydraulic breakers or milling drums, lives and dies by matching flow and pressure specs. An undersized machine bogs down, cycle times stretch out, and cuts come out uneven. This is one area where "close enough" costs you real time.
Attachment Type and Cutting Action
Prying with a bucket or ripper produces large, unpredictable slabs. A rolling or wedging cutting action produces more consistent material, which loads and hauls faster.
Rolling Wedge Milling Tools typically need replacement every 1–3 months, compared to roughly twice a week for standard carbide-pick teeth. Each tool carries nine carbide teeth and stays usable with one or two missing.
A full drum changeout takes about 20 minutes versus 1–2 hours for carbide setups—less downtime on any job where the attachment works hard.
Base Condition and Subgrade
Soft or saturated subgrade can cause the machine to sink or complicate grading once the asphalt's gone. Wet ground raises rutting risk substantially. If conditions are muddy, either wait for drier weather or bring in ground-protection mats before running heavy equipment over it.
Common Mistakes & Troubleshooting Tips
Common Mistakes to Avoid
- Attachment too light for the asphalt thickness: stalls the machine and wears teeth out faster than expected
- Skipped utility locates near the driveway edge are a frequent miss—lines often sit closer to the surface than expected
- Start at cracks, edges, or seams rather than attacking the surface at random so the attachment can get underneath
Troubleshooting Common Issues
| Problem | Likely Cause | What to Check |
|---|---|---|
| Attachment bounces or skips off the surface | Dull teeth or wrong attack angle | Inspect wear parts, adjust angle, slow travel speed |
| Machine loses traction or digs in unexpectedly | Wet/soft ground or excessive bite depth | Reduce cut depth, add plywood or ground mats |
If you're seeing repeated stalling rather than skipping, the attachment is usually undersized for the pavement, not an operator error.
When to Use a Skidsteer vs. Alternative Removal Methods
A skidsteer makes the most sense for residential driveways and small-to-mid commercial lots, where maneuvering around a garage door or mailbox matters more than raw excavation power. The same machine can haul, grade, and clean up the site in one continuous workflow.
That said, it's not always the right call:
| Method | Best Suited For | Trade-Off |
|---|---|---|
| Excavator with bucket teeth | Large, thick slabs; wide-open sites | Less agile in tight driveways, typically pricier to rent |
| Hand tools (jackhammer, pickaxe) | Small patch repairs only | Slow and exhausting for a full driveway |
| Milling/cold planer attachments | Jobs where reusing material as RAP matters | Higher upfront tool cost |
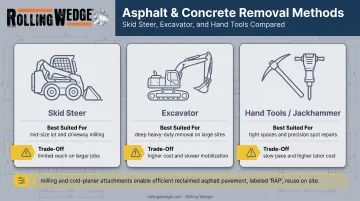
Milling attachments earn their place when you need controlled depth, cleaner edges, and reclaimed asphalt (RAP) you can reuse. Attachment cost is only part of the math; cutting-tool wear and downtime often decide whether the setup pays off.
For skidsteer and larger mill operators, Rolling Wedge Milling Tools are available with pricing available on request, with quantity-tiered volume discounts. Rolling Wedge also offers a Try & Buy (20-day evaluation) where companies can experience the technology on their own equipment, then purchase the drum or return it. Not a single drum has ever been returned. On larger or repeat jobs, longer tool life and fewer changeouts usually matter more than the unit price alone.
Frequently Asked Questions
Can a skidsteer remove asphalt?
Yes. A properly sized skidsteer paired with the right attachment (bucket teeth, a ripper bar, or a milling tool) can effectively break up and remove residential and small commercial driveways.
What is the most effective way to remove asphalt?
For residential driveways, a skidsteer with the right attachment is usually the most practical choice. Excavators fit large areas better, while milling attachments shine when you want reusable material or smaller, uniform debris.
How thick of asphalt can a skidsteer break up?
Most compact skidsteers handle common residential thicknesses of about 2–4 inches. Very thick or reinforced pavement may need a heavier attachment or a larger machine class.
Do I need a permit to remove an asphalt driveway?
Check your local municipal code first. Some cities require permits for driveway removal or replacement, and disposal rules for asphalt debris vary by location.
How long does it take to remove an asphalt driveway with a skidsteer?
Timing depends on driveway size, thickness, and the attachment used. With the right setup, many residential jobs wrap up in a single day.
What skidsteer attachment is best for removing asphalt?
Tooth buckets and ripper bars work fine for smaller jobs. Milling or cold planer attachments make more sense for larger projects, or when reduced tool wear and uniform debris matter most.